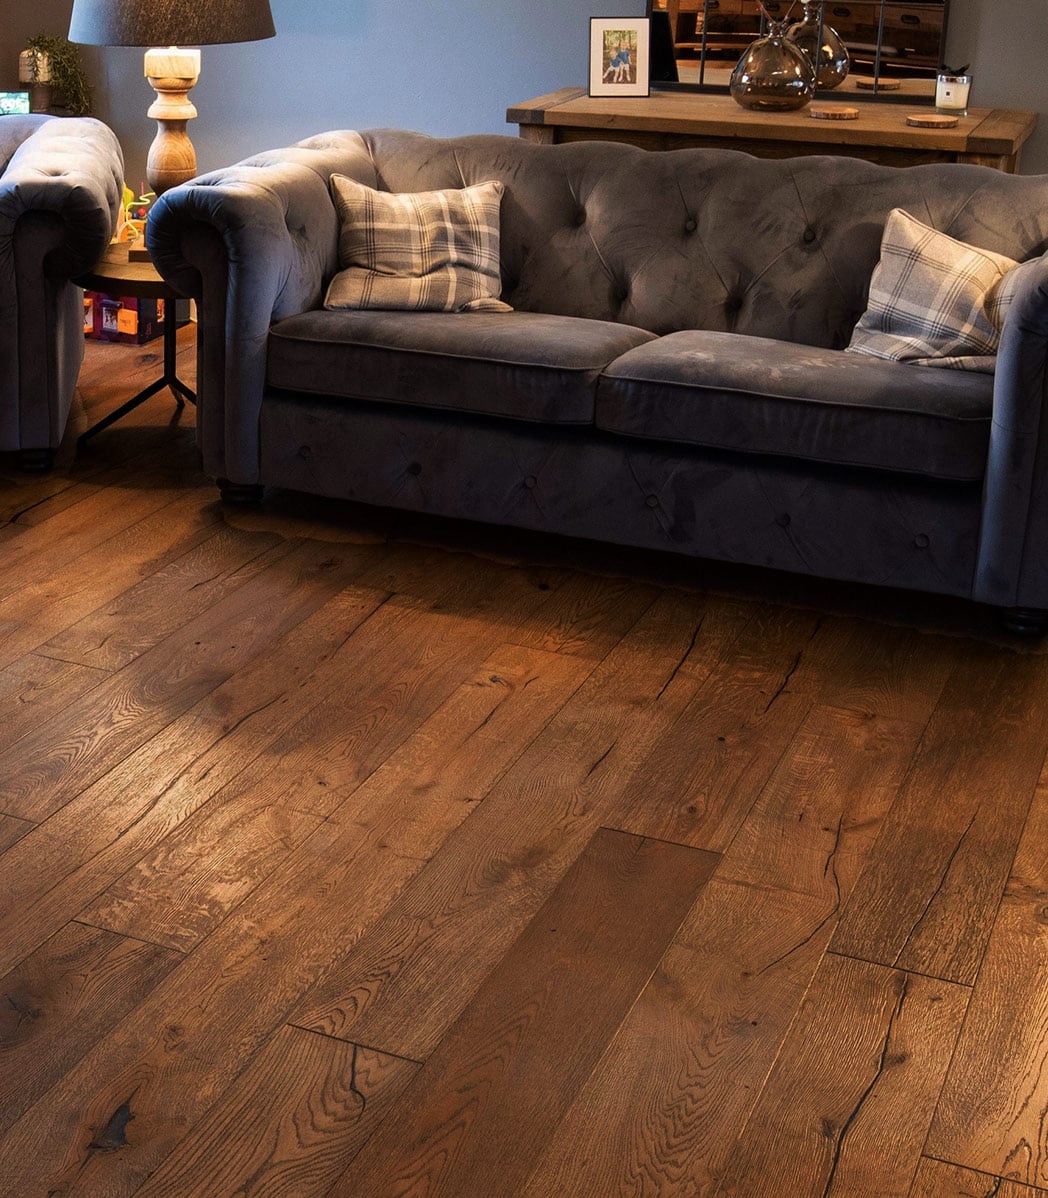
A living room floor has a way of tattling on the whole house. The best floor squeaking fixes start with finding where the wood is moving, not yanking up boards the minute a noise shows up. Most squeaks come from friction: board against board, board against nail, subfloor against joist, or a small gap that opens under foot pressure. For U.S. homeowners, that matters because many living rooms sit over basements, crawl spaces, or finished ceilings where access changes the repair plan. A 1930s oak floor in Ohio needs a different touch than a newer engineered floor in Arizona. Before you grab screws, powder, or filler, slow down and map the sound. Walk the room in socks. Mark each noisy spot with painter’s tape. Check whether the squeak fades after humid weather or gets worse during winter heat. That little pattern tells you more than a tool aisle ever will. For broader home maintenance planning, treat the floor as part of the house system, not a loose board problem alone.
Find the Real Source Before You Touch the Finish
A squeak sounds simple, but the source can hide a few inches away from where your foot lands. Living rooms make this harder because rugs, sofas, TV consoles, and traffic paths mask the pattern. You may hear the noise near the coffee table, then discover the loose spot sits closer to the wall where the subfloor flexes. That is why diagnosis saves money. It keeps you from filling seams that were never the cause.
Track the squeak path across the room
Start by clearing the noisy area. You do not need to empty the whole living room. Move the rug, lift floor lamps, and slide the coffee table aside so you can step on bare wood. Walk in slow lines, heel first, then flat foot. Mark each spot that speaks with a small piece of painter’s tape.
A good test feels almost silly. Stand beside the mark, not on it, and press the board with your thumb or toe. If the board moves but the squeak stays quiet, the sound may need full body weight. If it chirps under light pressure, you are likely dealing with board-edge rubbing or a raised fastener.
Here is the non-obvious part: the loudest squeak is not always the worst defect. A tiny dry gap between two finish boards can scream louder than a larger subfloor gap. The deeper problem often sounds dull, like a low creak, because wood and framing move together.
Separate surface friction from subfloor movement
Surface friction often has a sharp, high note. It may happen along a seam, near a board end, or where narrow strip flooring has loosened after years of foot traffic. Loose floorboards can make that sound when the tongue-and-groove edges rub. This is the kind of problem you can often calm from above.
Subfloor movement feels different. The floor may dip a hair under your step. The sound may stretch into a groan instead of a quick squeak. APA, the Engineered Wood Association, lists issues such as improper panel spacing, loose connections, joist problems, and clearance around ducts among common causes of floor squeaks.
In a U.S. ranch house with a basement below the living room, this distinction is gold. If you can see the underside, the cleanest repair may come from below. In an apartment or slab-on-grade home, you work from the top and choose methods that protect the finish.
Quiet Floor Squeaking Fixes From Above the Living Room Surface
Top-side repairs work best when the finish boards move against each other or against old fasteners. This is common in living rooms because the same few paths take years of abuse: the sofa to the hallway, the front door to the TV, the dining room opening to the center rug. The trick is restraint. You are not rebuilding the floor. You are stopping a small motion without leaving a scar.
Use dry lubricant where boards rub at the seams
For a light squeak along a seam, start with a dry wood-safe lubricant. Powdered graphite can work, though it stains fast, so use it with care on pale maple, white oak, or natural finishes. A cleaner choice for many homeowners is a flooring-safe powdered lubricant or talc-free powder brushed into the seam. Work it in with a soft brush, step on the area, then wipe the surface fully.
Do not pour oil into hardwood seams. It can darken the grain, catch dust, and interfere with future refinishing. The same warning applies to spray products that promise instant silence but leave residue. A living room floor catches sunlight, socks, pet hair, and dust. Anything sticky will announce itself later.
This fix is small, but it has a place. In a Denver home during February, dry indoor heat can shrink boards enough to create edge noise. A powder treatment may quiet the seam until humidity returns. That does not mean the floor is fixed for life. It means you have matched the repair to the scale of the movement.
Use breakaway screws only when the board needs holding power
When a board lifts under foot pressure, dry powder will not hold it down. A breakaway screw kit made for squeaky wood floors can pull the finish board tight to the subfloor. The screw head snaps off below the surface, leaving a small hole that you fill with color-matched putty.
This is where many DIY repairs go wrong. People drive screws into random spots and hope silence follows. Better: find the movement first, drill a pilot hole if the kit calls for it, and test the board after one screw before adding more. One well-placed fastener beats six nervous ones.
Avoid this method on thin engineered hardwood unless the manufacturer allows it. Some wear layers are too thin for a hidden screw repair. If your living room floor has a factory finish and beveled edges, test in a closet or hidden corner before you touch the main path. The goal is silence without a repair dot that catches your eye every morning.
Fix Gaps From Below When You Have Basement or Crawl Space Access
If the living room sits over an unfinished basement, you have an advantage. From below, you can stop subfloor movement without disturbing the hardwood surface. This is often cleaner than top-side fastening because you are working on framing, not finish. The tension is that underside repairs require better observation. You need someone walking above while you watch below.
Shim small gaps without lifting the floor
Have a helper step on the squeaky area while you stand below with a flashlight. Look where the subfloor meets the joist. A tiny gap may open and close with each step. That gap creates motion, and motion creates noise. A thin wood shim, tapped in with glue, can fill the space and stop the rub.
Use a light hand. The shim should fill the gap, not jack up the floor. If you drive it too far, you can create a hump in the living room. That is a bitter trade: less noise, worse floor. Mark the spot, add wood glue to the shim, tap until snug, and stop.
A common example shows up in split-level homes from the 1970s. The living room may have long joist spans and a favorite walking path from the entry to the kitchen. One joist bay moves, while the rest of the floor feels fine. A small shim can quiet that exact bay without touching the oak above.
Add blocking or adhesive for repeated subfloor movement
Some squeaks do not come from a single gap. They come from a weak area that flexes between joists. In that case, blocking can help. A short piece of lumber installed between joists supports the subfloor edge and reduces bounce. Construction adhesive can also help where the subfloor and joist meet, but it should not be smeared as a guess.
Use screws, not nails, when adding blocking from below. Screws pull wood tight and resist backing out. Nails can loosen again, which brings the noise back after a season of heating and cooling. If ducts, wiring, or plumbing run through the area, stop and plan the route before drilling.
The quiet insight here: the hardwood may be innocent. Squeaky hardwood floors often get blamed because they are visible. The real offender may be the plywood or plank subfloor moving under them. That is why underside access can turn a mystery into a clean repair.
For related planning, see this wood subfloor repair guide before you choose fasteners or blocking sizes.
Control Moisture and Furniture Loads So the Repair Lasts
A silent repair can fail when the room keeps changing shape. Wood responds to moisture, heat, air conditioning, rugs, sunlight, and heavy furniture. Living rooms collect all of those. A piano near an exterior wall, a sectional sitting over one joist bay, or a thick rug trapping moisture can change how the floor behaves. Repairs last longer when the room supports the wood.
Keep indoor humidity steady through seasonal swings
Hardwood expands and contracts as moisture changes. NWFA’s consumer guidance explains that wood floors can cup when they gain moisture and can gap or split when they lose moisture, with some seasonal gaps considered normal when they appear and disappear.
That matters in U.S. homes with forced-air heat. In January, indoor air can dry out fast. Boards shrink, seams open, and minor loose floorboards begin to rub. In August, humidity can swell the same floor and quiet one noise while creating another near a tight wall line.
A small hygrometer in the living room gives you a clue. You do not need a lab setup. Watch the pattern for a few weeks. If the squeak tracks with dry air, a humidifier may help more than a screw. If the room feels damp or the crawl space smells musty, adding moisture would be the wrong move.
Move weight before blaming the boards
Furniture can pin a floor in one area and leave another area free to move. A heavy sofa with narrow legs can press into a strip floor beside a traffic path. A bookcase along an exterior wall can hold boards tight while the middle of the room expands and contracts. The sound then appears in the open walking lane.
Try shifting the load before repairing. Move the sofa a few inches. Add wider furniture pads. Pull a thick rug back for a week. If the sound changes, you have learned something useful. The floor may need support, but it may also need room to move.
This is counterintuitive because homeowners often think heavy furniture should stop squeaks. Sometimes it does. Other times it creates a hinge point. The board cannot move under the sofa, so it moves beside it. That little edge of freedom is where the chirp begins.
For a broader seasonal routine, add this to your seasonal home maintenance checklist, especially before winter heat begins.
Choose the Right Repair Level and Know When to Call a Pro
Once you know the source, the question becomes scope. Some noises deserve a 20-minute fix. Others warn you that the floor system needs a closer look. The smart path is not always the cheapest one on day one. It is the one that avoids finish damage, repeat repairs, and hidden structural trouble.
Match the repair to the risk of visible damage
For a seam squeak, start with a surface-safe dry treatment. For a loose board in a low-visibility area, a breakaway screw may make sense. For subfloor movement over an unfinished basement, work from below first. This order protects the living room finish.
Avoid face-nailing old hardwood unless you accept the look. In some historic U.S. homes, visible finish nails may blend with the age of the floor. In a newer living room with a smooth satin finish, the same repair can look careless. The repair should match the floor’s character.
Color-matched filler also needs patience. Putty that looks close in the tube may look too red, too gray, or too shiny under living room light. Test it on scrap wood or a hidden corner. A quiet floor still needs to look like a cared-for floor.
Call a flooring pro when the squeak comes with warning signs
A squeak alone is usually not a crisis. A squeak with sagging, soft spots, cupping, stains, musty odor, or a sudden change after a leak deserves more respect. That is when you stop treating the sound and start checking the system.
If your living room sits over a crawl space, moisture can attack from below long before the top looks damaged. If the home had plumbing work, HVAC changes, or foundation movement, the floor noise may be a clue. A flooring contractor, carpenter, or home inspector can help identify whether the problem belongs to the hardwood, subfloor, joists, or moisture control.
One practical rule helps: if the repair needs more than a few top-side fasteners or a small underside shim, pause. More screws can hide movement for a while, but they can also make later repair harder. Silence is not the only goal. You want the floor to stay flat, safe, and worth refinishing years from now.
Conclusion
A squeaky living room floor can feel bigger than it is because you hear it during the quiet parts of the day. The fix starts with patient listening, then a repair that matches the movement. The right floor squeaking fixes do not punish the hardwood for a problem hiding below it. Some boards need a dry seam treatment. Some need a hidden fastener. Some need a shim, blocking, or moisture control from beneath the room. The best answer is rarely the loudest tool in the garage. It is the smallest repair that stops the motion and protects the finish. If the sound comes with bounce, stains, cupping, or a new soft spot, bring in a pro before you cover up the clue. Your living room should age with a little character, not a soundtrack that makes every late-night walk feel like a break-in.
Frequently Asked Questions
How do I stop a squeaky hardwood floor without pulling up boards?
Start by finding the exact spot, then match the fix to the movement. Dry lubricant can help seam friction. Breakaway screws can hold a loose board from above. If you have basement access, shims or blocking from below often give a cleaner repair.
Is it safe to screw down hardwood flooring from above?
Yes, when the floor is thick enough and you use the right screw system. Breakaway screws made for wood floors leave a small fillable hole. Avoid random drywall screws, and be careful with engineered flooring because the wear layer may be thin.
Why does my living room floor squeak more in winter?
Dry winter air can shrink hardwood and open tiny gaps. Those gaps let boards rub against each other or old fasteners. Forced-air heating can make the problem stronger in many U.S. homes, especially in cold states with long heating seasons.
Can baby powder fix squeaky hardwood floors?
It can quiet light seam friction for a short time, but it is not a deep repair. Use a clean, wood-safe dry powder and remove all residue from the surface. Avoid oily products because they can stain wood and affect future refinishing.
What does it mean if the floor squeak comes with a soft spot?
A soft spot suggests movement below the finish floor. The cause may be a loose subfloor, weakened framing, moisture damage, or past repair work. Do not cover it with filler. Check from below if possible, or ask a pro to inspect it.
Are squeaky floors a sign of foundation problems?
Usually, no. Many squeaks come from normal wood movement, loose fasteners, or subfloor gaps. Foundation concerns become more likely when squeaks appear with sloping floors, cracked walls, sticking doors, or sudden changes across several rooms.
Should I fix squeaks before refinishing hardwood floors?
Yes, handle the noise before sanding and finishing. Refinishing improves the surface, but it does not stop movement below the boards. A flooring contractor can mark squeaks, fasten loose areas, and then refinish over the small repair points.
What is the best fix for squeaks over a finished basement ceiling?
Top-side repair is often the best option when you cannot reach the underside. Use careful mapping, then consider dry lubricant for seams or breakaway screws for loose boards. If the floor feels bouncy, a contractor may need to open a small ceiling area.